

pantry Makeover
“I just wanted to give you guys an easy on the eyes and effortless method to pantry organising that doesn’t cost you the earth!”
So one of the many good things that have come out of this home ISO has been my productivity in organising myself throughout my home. Total Virgo cathartic energy coming out in full strength! 😉
SO I managed to score this awesome walk-in pantry in this new rental. Random right!? who has a walk-in pantry in a low budget rental!? I scored a good one in amongst this old money suburb! (sure it's not exactly the warmest home but! thankfully there's a split system in the living room so I'm covered there. Just not dishwasher which is a total bummer! but enough about these first world problems. let’s get onto this pantry!)
THE PLAN
Well to start. I wanted something cheap. I don't want to blow $400 on a pantry that I might only have for a year. And I assure you that's pretty easy to do when it comes to storage. It is expensive! I guess because its items you rarely buy over again… like its a buy once and don't replace for a long time so they have to mark it up to make it worth it?
Either way! I wanted budget. I wanted boujee. I wanted… insert another word that starts with B that fits in context.
WHAT WAS AVALIABLE
Well, there are many routes to go down. There are clear plastic trays, there are jute/grass baskets, there's white tubs and there are wicker baskets. In my old place, I had clear drawers which worked well in my tiny contemporary pantry. I could pull it out and get what I needed easily and it all fit nicely in the narrow style of cupboard. But in this new space, it was just looking too messy because you could see everything all out at once and it was just ‘loud.’ It all needed some calming down and also something to suit the style of this mid-century ESC pantry.
My main issue was that I wanted there to be enough baskets to fit on the shelf to make it feel full and not have heaps of negative space. otherwise, it makes it sort of redundant. Like it was an awkward height and width so it was hard to get a container that was both wide enough to fit at least 3 across and high enough to hide packets of food. Because I WAS NOT about to take every form of food out of its packaging and putting them in mason jars. That's just unrealistic let's be real. It's cute for a photo op. or an arch digest video tour. but not real, everyday life.
i might be a Virgo but not that kind of Virgo… haha!
WHAT I WENT WITH
I went with wicker baskets and glass jars from IKEA.


I needed it to be 2 different styles of packaging for it to feel not so ‘boxy’ and take away from the fact that this was a nice space to have. All baskets would be a bit dull and like the back room of a footlocker. We needed a little bit of spice!
these jars were nice because they weren’t full old school cookie jar. I didn’t want to be too vintage esc. I wanted a more clean line jar. This one also came with a lid with silicone lining so it was a total score and a half for $9AUD
I was considering some seagrass boxes. They were nice but expensive! And also a little ‘done.’ like they have been filtered down into super cheap markets. So it can look a little dollar store do-up real quick which is not something we want when they are charging 30 dollars up for one box right?
I was a little the worried the wicker baskets would be a little too reproduction french provincial ‘Hamptons try-hard.’
But, honestly, I have wicker already around my space so felt like I could carry the look off without it looking cheap. It was heading down an eclectic french corner store with the jars, and I was not bothered by that at all! because the french always do it right in my books.
OKAY!
So 9 baskets and 8 jars! - I could have honestly bought double of this because the pantry extends down further but like I said. I didn't want to burn money haha! Also, it leaves room for me to put bottles and larger things that stick up too much from the baskets. I just needed the shelves that you saw as you walked past each day to look ‘done’ for peace of mind you know?
delivered to my door. I was not heading out at all and IKEA has a great delivery service.
LAYOUT
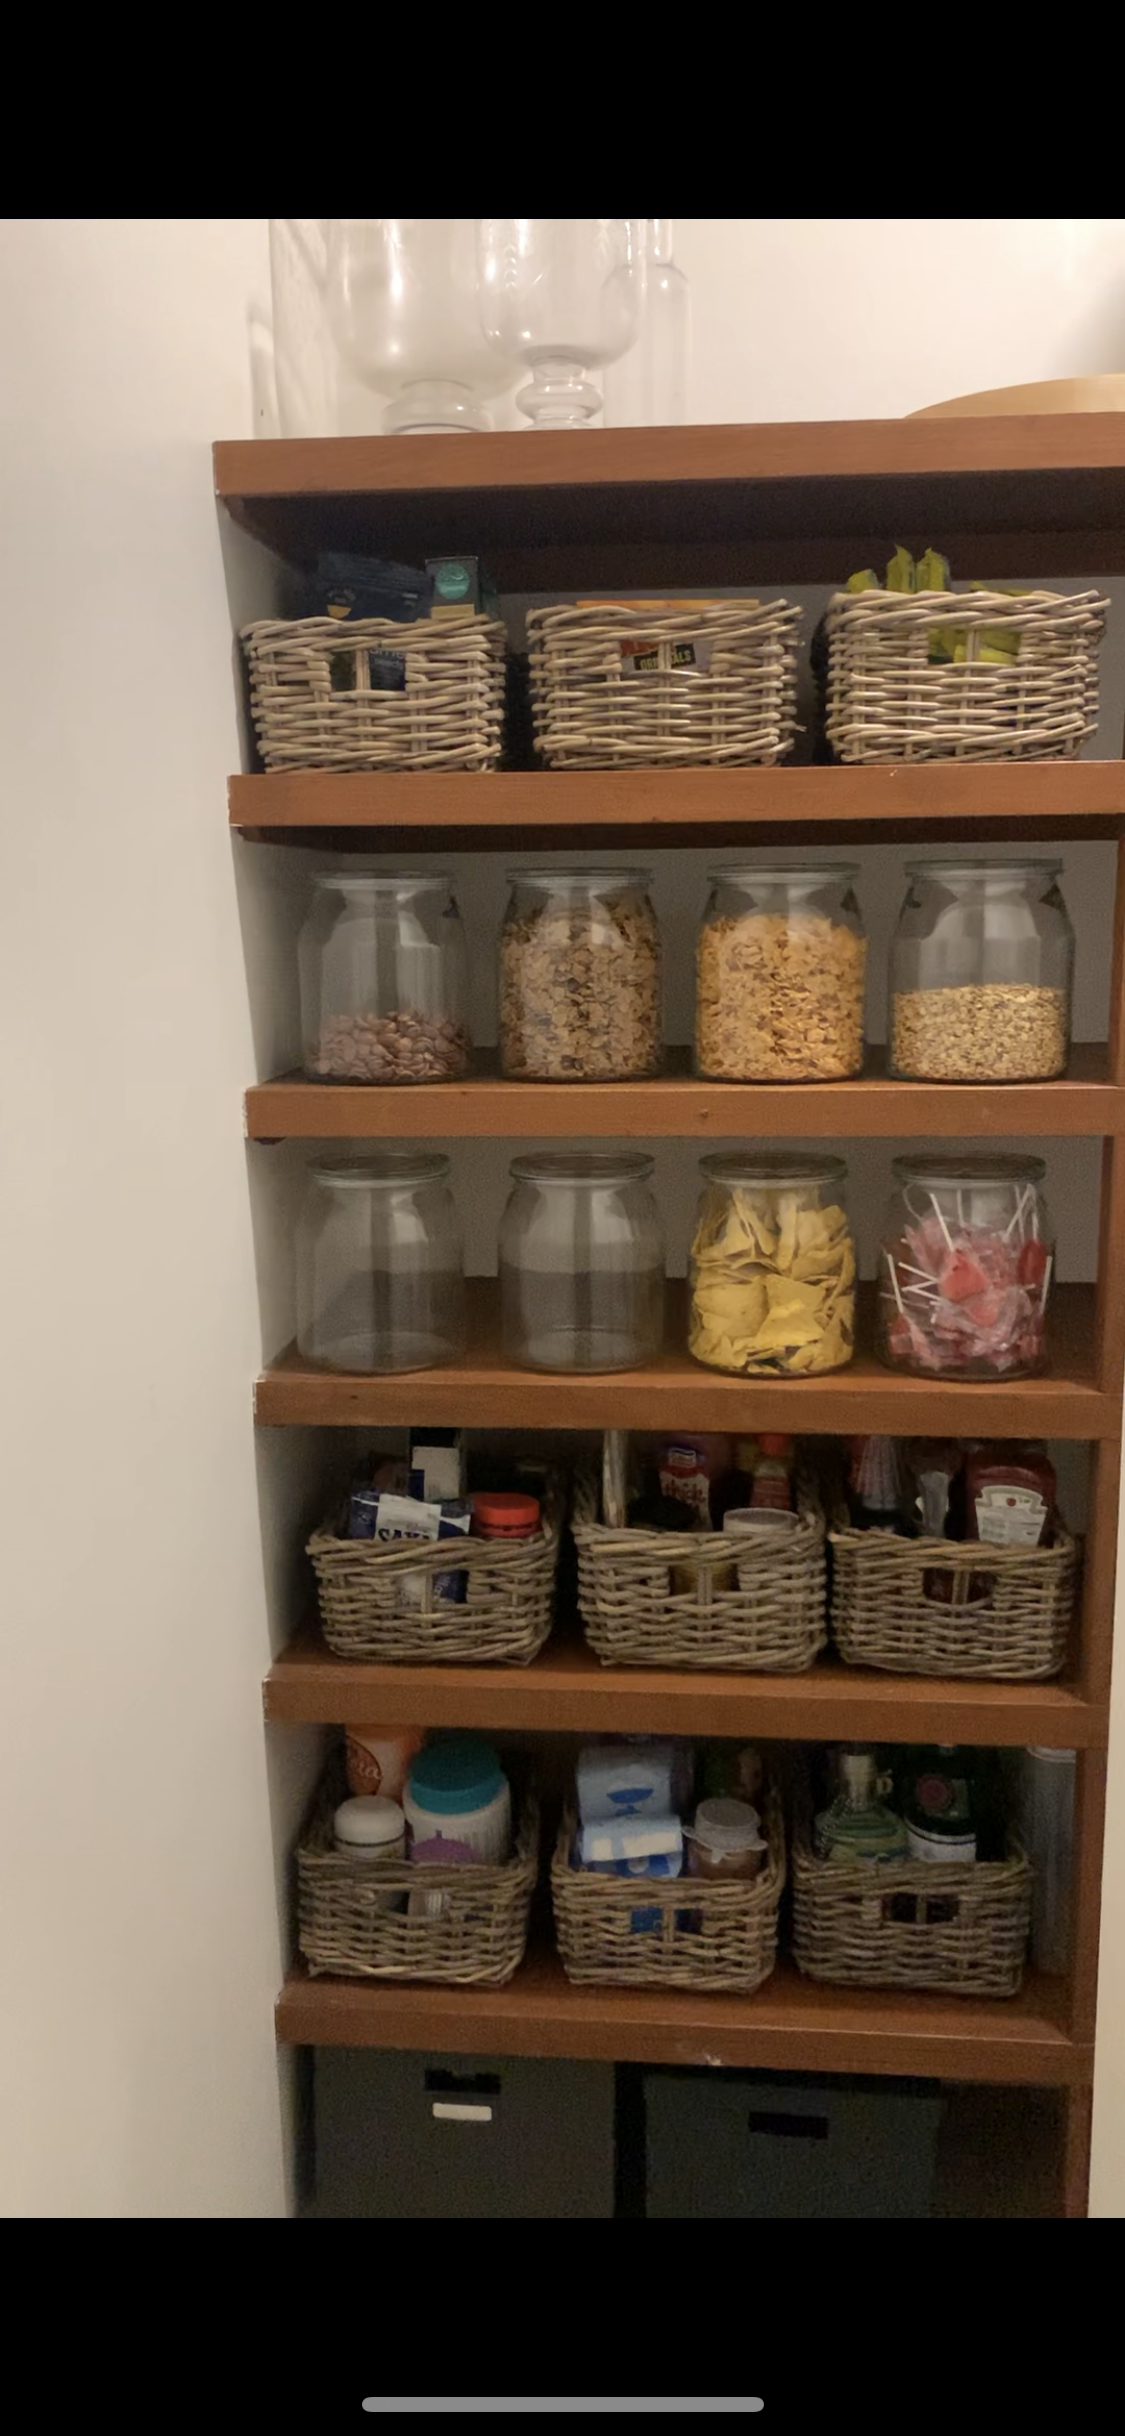
I organised them to be ‘glass at the very top, baskets, glass jars, glass jars, baskets, baskets.’ this way we had a good balance of the two textural elements. It gives it a more corner store vibe too with the jars being clustered in the centre and then a heavier wicker base. But there needed to be a break between the two different styles of glassware being the vases at the top and the IKEA jars.
So what goes in the jars you ask!? So like I mentioned earlier. This wasn't a photo op, Pinterest moment. I wasn't about to throw flour, sugar and all those baking goods into the glass jars. Because although they would complete this ‘50s pantry dream moment. It's not realistic. I'm not baking all that much. If anything I'm avoiding carbs at this point! hello, self iso I cannot have any more pasta or potatoes! So I opted for cereals, muesli, rivetas, corn thins. You know, that bread alternative stuff and health food focus stuff that makes me feel like I live in LA or something? 😉( I just need a crystal and I'm Gwyenth Paltrow at this point haha!) and then i could throw everything else into the baskets.
I have some upper cabinet storage in my kitchen that I store all my Tupperware in so its all good in that department. And then larger items like bottles (Sem Pellegrino? no just kidding haha! coke zero let's be real) on that side you don't see unless you walk into the space.
WHAT ABOUT LABELS?
you can label everything if you like/decide to take on this pantry do over yourself. I just opted not to because honestly, I don't need labels “I don't do labels” - every Millienial ever!
Because me and my partner are the only ones living here. We know where everything is and I don't want to spend time relabelling everything and throwing stuff in mason jars and doing all that jazz. I want an easy on the eyes and effort solution! Id recommend you get some masking tape and just tape the bottom and write down the expiry date of those items in the jars though. which is cheaper than a label maker and just does the job without obstructing the overall look and feel of this new french patisserie - minus all the good pastries.
HOW MUCH WAS IT ALL IN THE END?
Overall this project cost me $160 including delivery which is WAYYYY better than $350-$450 that I could have easily spent if I went down another route. At least these items I can use again when I move around and serve other purposes. These jars are easily vases and propagation stations. and the baskets can be spread out around my next place in the pantry, under the sink, wardrobes and where-ever else.
anyway! I hope this has inspired you to get your pantry game going! if not, it make have helped out with somewhere in your home that needs organising.
I just wanted to give you guys an easy on the eyes and effortless method to pantry organising that doesn't cost you the earth!
until next time, check out all my content on youtube, Instagram, Pinterest etc. I'm all over everything pretty much these days and there's lots of different content to take in and follow along! 😊